How to Do a Handstand: Beginner Steps and Progression
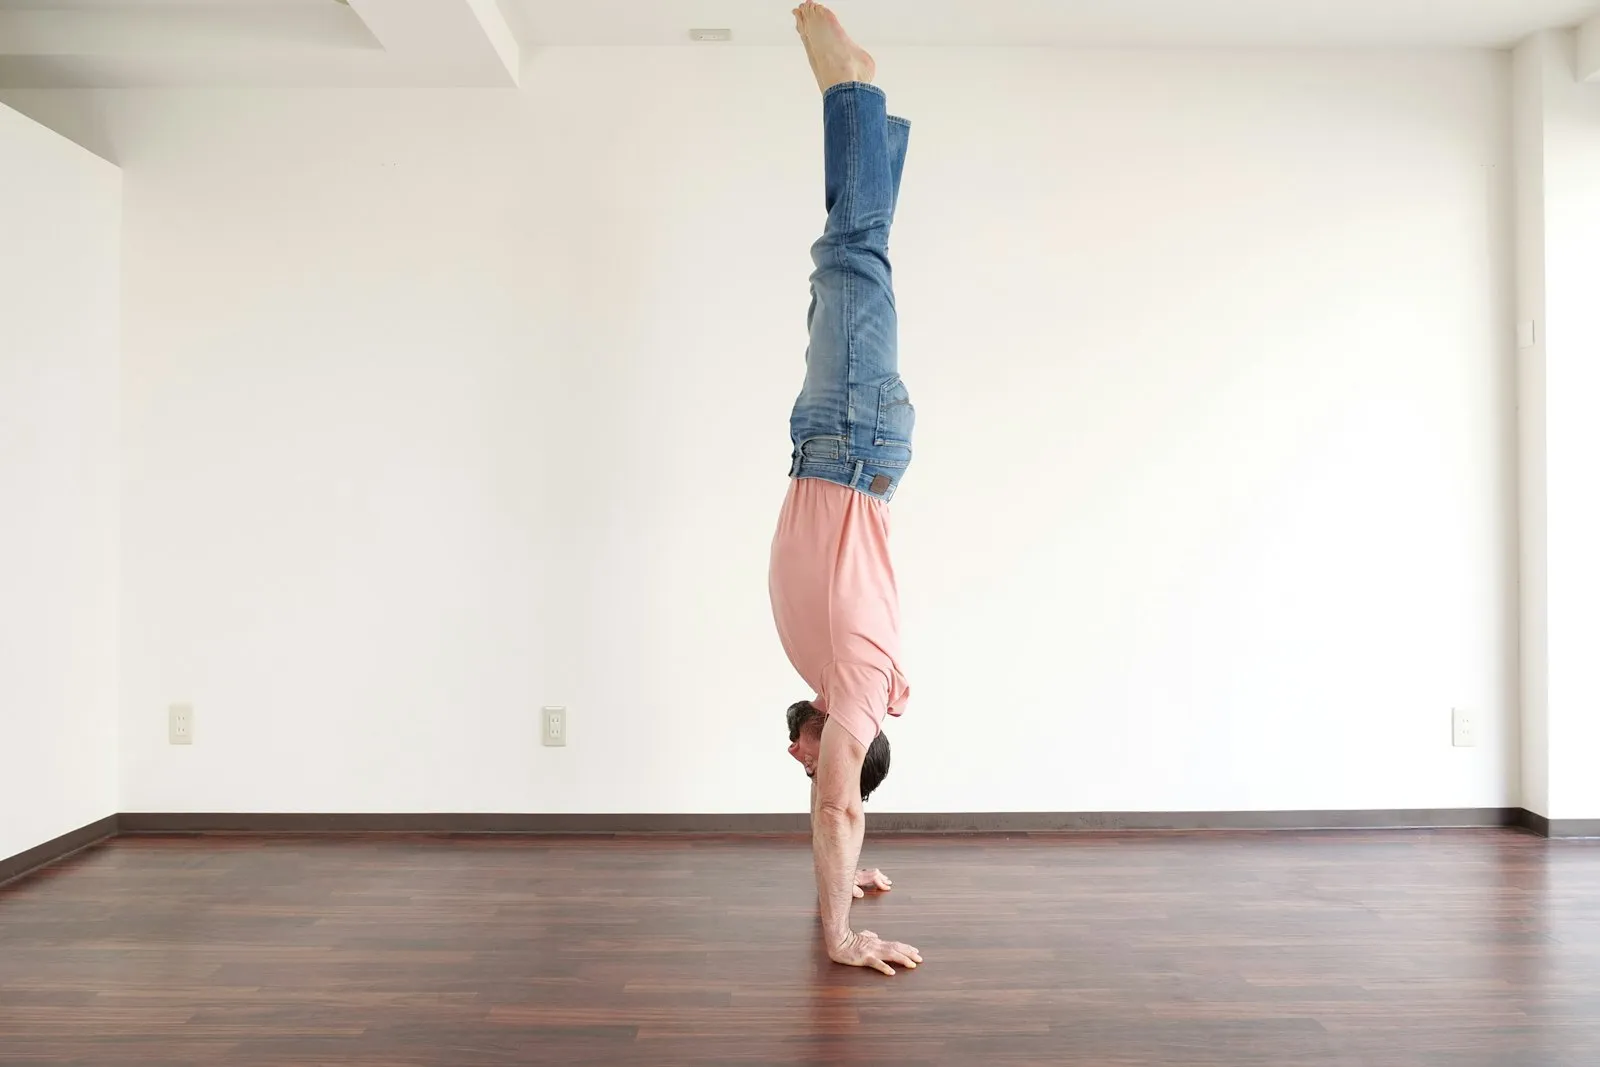
How to do a handstand as a beginner: a 10-step progression with clear targets, wrist prep, wall drills, safe bails, the kick-up, balance cues and a weekly plan.
The handstand is one of the most satisfying skills in calisthenics. It looks impressive, it needs no equipment, and it teaches you more about body control than almost any other exercise. It’s also a skill, not just a strength test: you don’t “get strong enough” for a handstand, you learn it.
That changes how you should train it. Here’s a clear path from your first wall hold to your first seconds of free balance.
The short answer: to do a handstand, place your hands shoulder-width apart, kick one leg up with control and stack your hands, shoulders, hips and feet in one straight line, arms locked, ribs in, eyes on the floor between your hands. You keep the balance with your fingers: press them into the floor when you start to tip over, ease off when you sink back. As a beginner, don’t start with free kick-ups: prepare your wrists, learn the hollow body on the floor, build a 45 to 60 second chest-to-wall hold, master the cartwheel bail, then practise kick-ups and toe pulls away from the wall. Ten to fifteen minutes, four to six days a week, works better than one long session.
Each step is detailed below, with a progression table that tells you exactly when to move on. If you’d like the wall work, push-ups and core sets planned together week after week, Titan Mode builds your calisthenics plan around your goal, your schedule and your equipment: pick the skills and strength goal.
What you need before you start
You don’t need to be super strong, but a few basics make the learning curve much smoother:
- Pushing strength: being able to hold the top of a push-up for 30 seconds with a tight body. If push-ups are still hard, work through the first steps of our push-up progression before going upside down.
- Shoulder mobility: raising your arms straight overhead, in line with your ears, without arching your lower back.
- Wrist tolerance: your wrists will carry your whole body weight at an angle they rarely see. They need preparation.
- A safe space: a clear wall, a floor with some grip, and nothing sharp around you.
Handstand progression at a glance
Use this table to find your starting point. Start at the first step you can’t yet do cleanly, and move on only when you reach the target on two sessions in a row.
| Step | Exercise | Target before moving on |
|---|---|---|
| 1 | Hollow body hold on the floor | 3 × 30 s, lower back flat |
| 2 | Plank hold with shoulders pushed tall | 3 × 30 s |
| 3 | Pike hold on the floor or feet on a box | 3 × 20 s, hips over shoulders |
| 4 | Frog stand (knees resting on elbows) | 3 × 15–20 s |
| 5 | Wall walk, chest to wall | 3–5 controlled reps up and down |
| 6 | Chest-to-wall hold | 30 s, then 45–60 s with a straight line |
| 7 | Cartwheel bail | Automatic to both sides, from a kick-up |
| 8 | Toe pulls from the wall | 3–5 s of balance, 5 times per session |
| 9 | Kick-up to free balance | 3–5 s, several times per session |
| 10 | Free-standing handstand | 10 s, then 30 s |
Most adults start between steps 1 and 5. There is no prize for skipping steps: a strong chest-to-wall hold is the foundation everything else rests on.
Step 1: Prepare your wrists (every session)
Skipping wrist prep is the most common beginner mistake. Even in gymnastics, where hand balancing is part of every session, wrist pain is common: in one study of young non-elite gymnasts followed for a year, over half reported it, and for most it didn’t go away with continued training (DiFiori et al., 2002). Spend three to five minutes on preparation before every handstand session:
- Wrist circles: ten slow circles in each direction, fingers interlaced.
- Palm-down rocks: on all fours, hands flat, fingers forward. Gently rock your weight forward and back, 10 to 15 times.
- Fingers-back stretch: same position, fingers pointing toward your knees. Lean back gently for 20 to 30 seconds.
- Back-of-hand stretch: back of your hands on the floor, light pressure, 15 to 20 seconds.
- Finger pulses: in a push-up position, press your fingertips into the floor so your palms lift slightly, 10 reps.
Effort and stretch are fine. Sharp or pinching pain is not: back off and reduce your volume. If wrist pain persists from one session to the next, see a physiotherapist or doctor rather than training through it.
Step 2: Learn the body line on the floor
Before going upside down, learn the shape you’re aiming for. A good handstand is a straight stack: hands, shoulders, hips and feet in one line.
- Hollow body hold: lying on your back, lower back pressed into the floor, arms overhead, legs straight and slightly lifted. Build up to 3 sets of 20 to 30 seconds. If the full version arches your back, our hollow body hold guide has easier levels and a six-week plan.
- Shoulder taps in plank: teaches you to shift weight between your hands while staying tight.
- Pike push-ups: build overhead pushing strength in a position close to the handstand. Our pike push-up progression goes from the floor to wall handstand push-ups.
The hollow body is the key. Most “banana” handstands, with a big arch in the lower back, come from not being able to hold this shape.
Step 3: Wall drills, chest to wall
Chest-to-wall (facing the wall) is the best way to build a straight handstand. Your back is to the room, your belly faces the wall.
How to get into it
- Start in a push-up position with your feet against the wall.
- Walk your feet up the wall, one step at a time.
- Walk your hands back toward the wall as your feet climb.
- Stop when your hands are 10 to 20 cm from the wall and your body is close to vertical.
- Walk back down the same way, slowly.
What to focus on
- Push the floor away: shoulders fully open, as if you were trying to grow taller.
- Squeeze your glutes and legs: toes pointed, legs together.
- Ribs in: think of the hollow body you practiced on the floor.
- Eyes: look at the floor between your hands, not far in front of you.
| Week | Chest-to-wall work |
|---|---|
| 1 to 2 | Wall walks, 3 to 5 reps, short holds of 10 to 20 seconds |
| 3 to 4 | Holds of 30 seconds, closer to the wall |
| 5 and after | Holds of 45 to 60 seconds, toe taps away from the wall |
Once you can hold 45 to 60 seconds comfortably, start toe pulls: from the wall, pull one foot off, then both, and find a few seconds of balance before touching back. That’s your first taste of free balance, with a safety net.
Step 4: Learn to bail safely
Fear of falling is what holds most people back. The fix is simple: practice falling on purpose, before you need it.
The standard bail is the cartwheel exit: when you overbalance, move one hand off the floor, turn your hips to the side, and step down with your feet, like a cartwheel. Practice it in this order:
- From a squat, place your hands, kick up a little, and turn out to the side.
- Kick a bit higher each time, always exiting with the cartwheel.
- Practice to both sides so you’re never stuck.
Avoid rolling forward onto your back unless you’ve learned to roll properly on a soft surface. Once the cartwheel exit becomes automatic, the fear fades and you can actually focus on balance.
Step 5: The kick-up
To balance freely, you first need to arrive in the right place, consistently. That’s what the kick-up is for.
- Lunge position: arms straight overhead, one leg forward.
- Hands down: place your hands about shoulder-width apart, close to your front foot.
- Kick with control: the back leg swings up straight, the front leg pushes off, then joins.
- Aim for the stack: shoulders over hands, hips over shoulders.
The most common errors are kicking too hard (and falling over) or too soft (and coming back down). Practice against a wall with your back to it at first, aiming to touch it lightly with your heels rather than slamming into it. Then move away from the wall and try to “float” into balance for a split second.
Step 6: Finding balance
Here’s the secret: balance in a handstand is controlled mostly by your fingers and palms, not your arms. Biomechanics research backs this up: in the best handstands measured in one force-plate study, most of the correction came from the wrists and shoulders, while balances that relied on bending at the hips were the less successful ones (Kerwin & Trewartha, 2001).
There are two ways to lose a handstand, and each has its own correction:
- Overbalancing: your legs and hips drift past your hands, toward the side your fingers point to, and you’re about to tip over the top. Dig your fingertips into the floor, as if you were trying to grab it. That pressure pushes your body back over your hands. If it’s too late, bail with the cartwheel.
- Underbalancing: your legs haven’t come far enough over your hands and you’re sinking back toward the side you kicked up from. Your weight sits in the heel of your hands. Ease off your fingers and lean your shoulders slightly forward over your hands, or simply kick a little harder next time.
Think of your hand as a foot. When you stand and lean forward, your toes grip the floor to stop you; when you lean back, your weight goes into your heels. A handstand works the same way, just upside down, with the fingers playing the role of the toes. In the beginning, those corrections will feel big and clumsy. With repetition, they become small and automatic.
Where to look
Your head position changes your balance more than you’d think. A review of handstand balance research names visual control and head position among the main factors that decide how long gymnasts can hold a handstand (Hedbávný et al., 2013). For beginners, the practical rule is simple: keep your head neutral between your arms and look at a spot on the floor between your hands. Pushing the head far forward to look ahead pulls you into an arch; tucking it in toward your chest makes you lose your reference point.
Balance drills away from the wall
Free balance can be practised before you can hold a free handstand. These drills teach the same finger control with less height and less fear:
- Frog stand: squat down, hands flat on the floor shoulder-width apart, knees resting on the backs of your upper arms. Lean forward until your feet float. It’s a low, safe way to feel your fingers catching an overbalance. Work up to 15 to 20 seconds.
- Wall toe taps: in a chest-to-wall hold, take both feet off the wall for a split second and tap back, then stay off a little longer each time.
- Heel pulls (back to wall): kick up to the wall with your back to it, then gently pull one heel off, then both, and look for balance. Useful for linking the kick-up to free balance, as long as you keep your ribs in.
- Spotted holds: a partner stands beside you and catches your thighs or ankles, then lets go for a second or two. It lets you feel a straight handstand far from the wall.
Two or three minutes of these drills at the end of a wall session are enough.
A weekly practice plan
Handstands reward frequency. Short, regular sessions beat a long weekly grind, because you’re training your nervous system as much as your muscles.
| Day | Session (10 to 20 minutes) |
|---|---|
| Monday | Wrist prep, hollow body, chest-to-wall holds |
| Tuesday | Wrist prep, bail practice, kick-ups |
| Wednesday | Rest or light wrist mobility |
| Thursday | Wrist prep, chest-to-wall holds, toe pulls |
| Friday | Wrist prep, kick-ups, free balance attempts |
| Saturday | Light session: a few wall holds and kick-ups for fun |
| Sunday | Rest |
If you’d rather not plan these sessions yourself, Titan Mode organises your week around the number of sessions you can really do, with each exercise shown, your sets logged and your rest timed, so the wall work and the strength work stay balanced.
A few rules:
- Practice fresh: do handstands at the start of your workout, not after you’ve exhausted your shoulders with push-ups and dips.
- Quality over quantity: stop when your form falls apart. Sloppy reps teach sloppy balance.
- Keep it short: 10 to 15 good minutes are worth more than 45 tired ones.
A realistic timeline
Everyone progresses at a different speed, and age, body weight, mobility and past sports (gymnastics, climbing, yoga, dance) make a big difference. As a rough guide for a consistent beginner:
| Phase | What you can expect |
|---|---|
| First weeks | Wrists adapt, comfortable wall walks, 20 to 30 second holds |
| First 1 to 2 months | 45 to 60 second chest-to-wall holds, a reliable bail, regular kick-ups |
| Next few months | Toe pulls, a few seconds of free balance, more consistent kick-ups |
| After that | Holds of 10 seconds and more, the start of more advanced work |
The free-standing handstand often feels stuck for weeks, then suddenly clicks. That’s normal for a balance skill. Keep logging your sessions so you can see the progress you can’t feel day to day, in a notebook or a training app; several of the best calisthenics apps include dedicated handstand tutorials.
The errors that keep you on the wall
- Banana back: arching the lower back. Fix it with hollow body work and chest-to-wall holds.
- Bent arms: elbows must stay locked. If they bend, you need more wall time and pushing strength.
- Closed shoulders: arms not fully overhead. Work on shoulder mobility and “push the floor away”.
- Looking too far ahead: it pulls you into an arch. Look between your hands.
- Correcting with the hips: piking or arching to save the balance. Let the fingers and palms do the work.
- Skipping wrist prep: the fastest way to get sidelined.
- Training only on weekends: frequency matters more than duration.
Safety: who should be careful
Going upside down is safe for most healthy people who build up gradually, but a few situations call for a medical opinion first. Inversions raise the pressure in your head and eyes for a short time, so if you have uncontrolled high blood pressure, glaucoma, a detached retina or a recent eye surgery, ask your doctor before practising. The same goes for pregnancy, a recent head, neck, shoulder or wrist injury, or a history of fainting or dizziness when you stand up quickly.
For everyone else, the usual safety rules are enough: a clear space with no furniture nearby, a non-slip floor, a practised bail, and stopping the session as soon as your arms start to bend from fatigue. Come down slowly and stay kneeling for a few seconds if you feel light-headed.
After your first handstand: what comes next
Once you hold 10 to 30 seconds freely, you have several directions:
- Longer and cleaner holds: work toward 30 to 60 seconds with legs together, toes pointed and no correction from the hips.
- Overhead strength: pike push-ups on the floor, then feet on a box, then wall handstand push-ups. They are covered in the shoulder branch of our push-up progression, and our calisthenics shoulder workout turns them into full routines by level.
- Shape variations: straddle, tuck and walking on your hands, which train balance in new positions.
- The planche: the same wrists and shoulders, now with the body horizontal. Our planche progression starts with leans you can begin alongside your handstand work.
- The human flag: the locked-arm push you learn upside down is exactly what the bottom arm does in the human flag, which is why a solid wall handstand is one of its prerequisites.
- The press to handstand: lifting into the handstand without a kick. It’s an advanced goal that needs strong shoulders, compression (as in the L-sit) and a solid hollow body.
Where the handstand fits in your training
The handstand pairs well with the rest of your calisthenics. Overhead strength from pike push-ups and handstand holds supports your pushing, while the body tension from the hollow body carries over to pulling skills too: it’s what keeps the swing controlled when you learn how to do a muscle-up. If you’re still building your base, our 12-week beginner calisthenics program already includes pike push-ups and hollow holds, so a few minutes of wall work before each session fits right in.
The hollow body is also the shape that fixes most arched handstands, so it’s worth training as an exercise in its own right: our hollow body hold guide explains how to progress from the dead bug to hollow rocks.
A few minutes upside down, most days
The handstand isn’t reserved for gymnasts. With prepared wrists, a straight line against the wall, a reliable bail and short, frequent practice, most people can learn it. On the weeks when balance feels stuck, your log is what tells you it isn’t: a longer wall hold, one more clean bail, a kick-up that lands more often. Keeping that record set by set, holds included, is one of the things Titan Mode is designed to do for you.
This article is general information, not medical advice. If you have a medical condition, an injury, pain or are pregnant, talk to a health professional before changing your training or diet.
FAQ
How long does it take to learn a handstand?
It varies a lot with your starting strength, mobility and how often you practice. Many beginners build up to a solid 45 to 60 second chest-to-wall hold within one to two months, while a consistent free-standing hold usually takes several months of short, frequent practice.
How often should I practice handstands?
Short and frequent beats long and rare. Ten to fifteen minutes, four to six days a week, works better than one long session, because balance is a skill your nervous system learns through repetition.
Is a handstand bad for your wrists?
Not when you build up gradually. Warm your wrists up before every session, spread your fingers, and increase hold times slowly. If you feel sharp pain rather than effort, stop and reduce the volume.
Should I learn the handstand facing the wall or with my back to it?
Start with chest-to-wall. It forces a straight body line and teaches you to stack your shoulders. Back-to-wall is useful for kick-up practice but tends to encourage an arched back.
How long should a beginner hold a handstand?
Against the wall, aim for 30 seconds first, then 45 to 60 seconds with a straight body; that is the usual signal that you are ready to work away from the wall. Free-standing, your first goal is simply 3 to 5 seconds of controlled balance, then 10, then 30. Short clean holds teach more than long shaky ones.
Can adults learn a handstand?
Yes. Adults without a gymnastics background learn handstands all the time; it usually takes longer than for children because of wrist and shoulder stiffness, body weight and fear of falling, not because of age itself. Short, frequent sessions, patient wrist preparation and a reliable bail matter more than your age.
Should I learn a headstand before a handstand?
You don't need to. A headstand is easier to balance because the base is wider, but it loads the neck and teaches a bent-arm position. If your goal is a handstand, the frog stand, wall walks and chest-to-wall holds are more useful first steps.
Do I need to be flexible to do a handstand?
You need one specific kind of flexibility: raising your arms fully overhead without arching your lower back. You don't need splits or a deep backbend. If your arms stop short of your ears, add a few minutes of shoulder mobility to each session and use the wall while it improves.
Sources
- Kerwin D.G., Trewartha G. (2001). Strategies for maintaining a handstand in the anterior-posterior direction. Med Sci Sports Exerc.
- DiFiori J.P. et al. (2002). Wrist pain in young gymnasts: frequency and effects upon training over 1 year. Clin J Sport Med.
- Hedbávný P., Sklenaříková J., Hupka D., Kalichová M. (2013). Balancing in handstand on the floor. Science of Gymnastics Journal.