Planche Progression: From Planche Lean to Full Planche
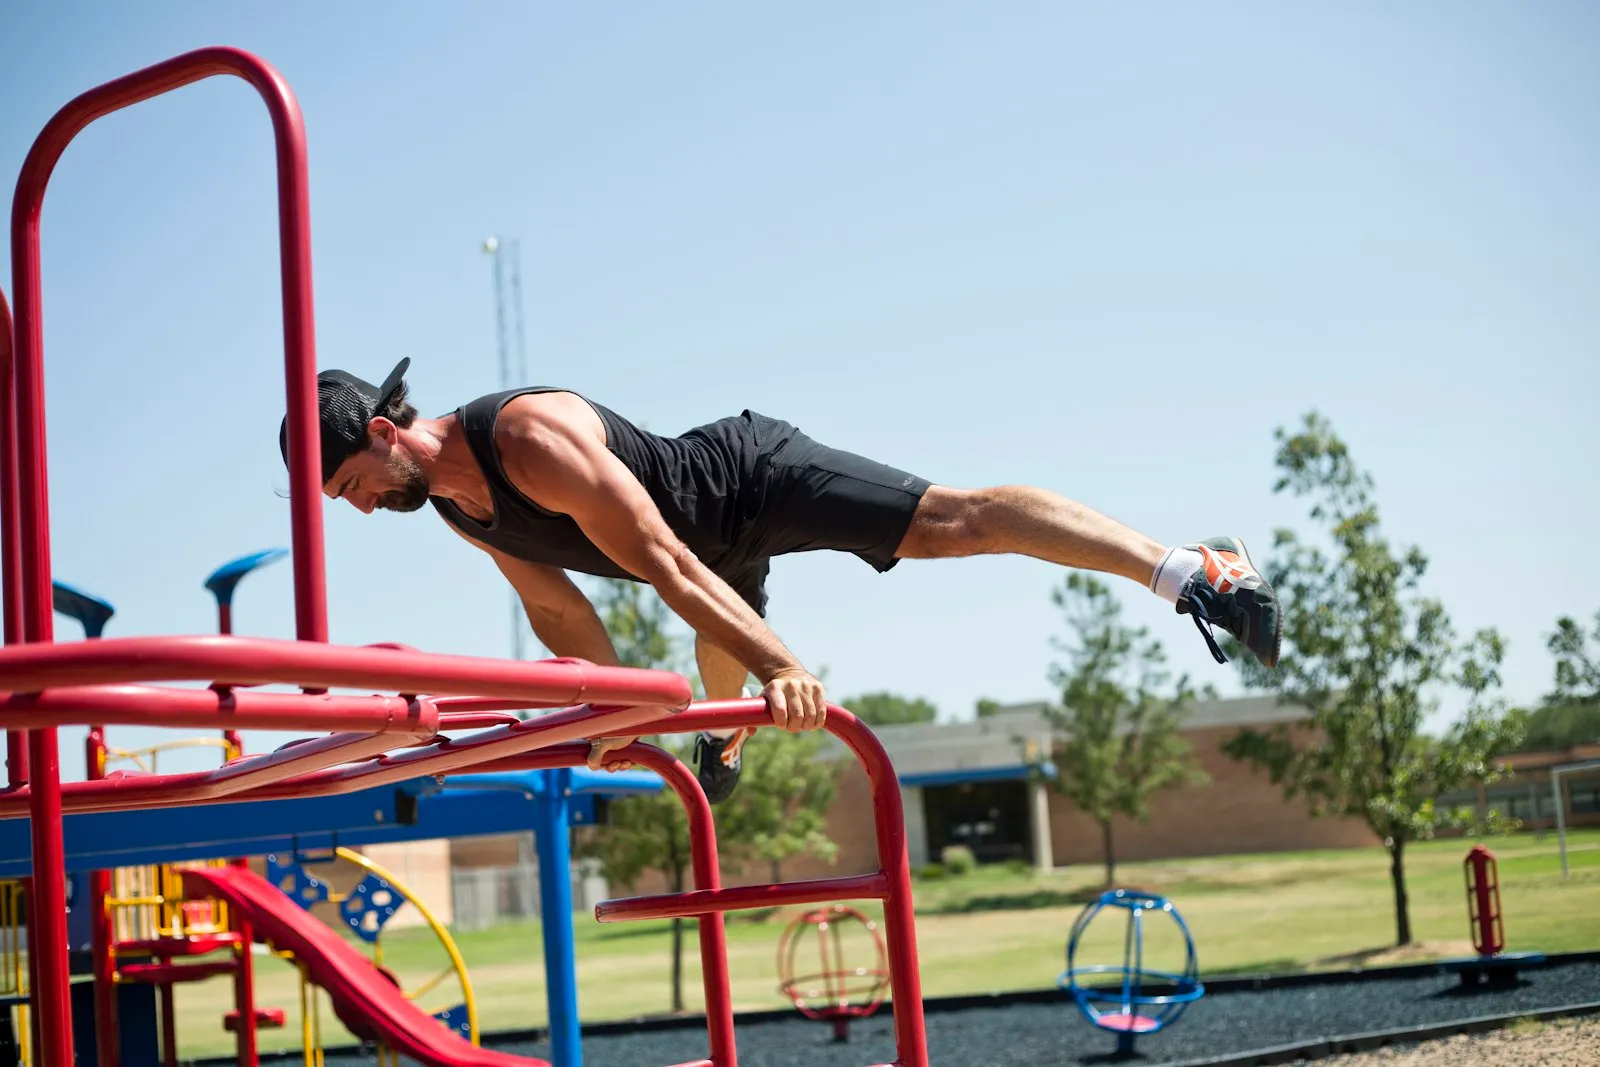
Planche progression step by step: lean, tuck, advanced tuck, straddle, full planche, planche push-ups, band work, a 12-week plan and wrist safety.
The planche is the skill most people picture when they think of advanced calisthenics: the whole body floating horizontally above the ground, balanced on straight arms, feet in the air. It’s one of the hardest bodyweight holds there is, and also one of the most honest. There’s no trick and no momentum, only straight-arm pushing strength, a strong core and a lot of patience. The good news is that every step on the way builds real strength, and the early stages are reachable within months.
The short answer
A planche is a static hold where you support your whole body horizontally on straight arms, with the shoulders leaning well in front of the hands. It mainly works the front deltoids, the chest, the serratus anterior and the core. You learn it through a ladder of easier positions: planche lean → frog stand → tuck planche → advanced tuck → straddle → full planche. Train holds of 5 to 15 seconds, 2 or 3 times a week, and move up when you reach 3 × 15 seconds with straight arms and clean form. Start with roughly 20 push-ups, 10 dips and pain-free wrists. The tuck takes months; the full planche usually takes years.
The rest of this guide covers each stage, the drills that speed things up, a weekly plan and how to keep your wrists and elbows healthy. If you’d like your skill work sequenced with the rest of your training, Titan Mode builds a skills and strength plan around your equipment and your schedule.
Are you ready for the planche?
The planche is an intermediate to advanced skill. Starting too early mostly gives you sore wrists and bent arms. Check these benchmarks first:
| Benchmark | Target |
|---|---|
| Push-ups | 20 clean reps |
| Dips | 10 strict reps |
| Hollow body hold | 30 s, lower back on the floor |
| Wall handstand | 30 s, chest to wall or back to wall |
| Wrist extension | Palms flat, fingers forward, no pain leaning over them |
If push-ups are still a challenge, the push-up progression and the dips guide are better uses of your time right now. Planche leans can start alongside them, but the tuck will come faster with this base.
What makes the planche so hard
Think of your body as a seesaw balanced on your hands. To stay horizontal, your center of mass, roughly at your hips, has to sit directly above your hands. That means your shoulders must lean far in front of your wrists, and the longer your body, the further that lever extends. Your front shoulders and chest have to hold the whole thing with straight arms, at an angle where they’re mechanically weak.
That’s why each stage works by shortening the lever. Tucking the knees brings your center of mass closer to your hands; opening the legs to a straddle shortens it less; the full planche is the longest lever of all. Each step looks small on video but represents a big jump in strength.
Muscles worked
- Front deltoids: the main engine, holding the arms angled back under you.
- Chest (pectorals): help the shoulders push forward and down.
- Serratus anterior: keeps the shoulder blades spread around the ribcage (protraction), which rounds your upper back.
- Triceps and biceps: the triceps lock the elbows; the biceps are stretched and loaded, which is why straight-arm work needs patience.
- Core and glutes: keep the hips from sagging and the legs from dropping.
- Wrist and forearm muscles: support your weight in strong wrist extension.
The planche progression ladder
The exit criterion is the same at every stage: 3 sets of 15 seconds, arms straight, shoulders protracted, hips at the right height. Don’t rush: a clean hold at an easier stage builds more strength than a sloppy one at a harder stage.
Stage 0: protraction and planche lean
Scapular push-ups: in a plank, keep the arms straight and push the floor away so your upper back rounds, then let the chest sink between the shoulder blades. 3 × 10 to learn the protracted position you’ll hold in every stage.
Planche lean: start in a push-up position with the fingers turned slightly out or back, arms locked. Lean your shoulders forward past your hands while staying on your toes, upper back rounded, body straight. Start with a small lean and increase the angle over the weeks. Target: 3 × 20–30 seconds with the shoulders clearly in front of the hands.
Stage 1: frog stand
Squat down, place your hands shoulder-width apart, rest your knees on the backs of your upper arms and lean forward until your feet lift. It’s a balance drill more than a strength drill, and it teaches you how far forward you need to lean. Target: 30 seconds. Then try lifting the knees off the elbows for a second: that’s your first taste of the tuck.
Stage 2: tuck planche
Hands on the floor or on parallettes, arms straight, knees pulled tight to the chest, back rounded, hips at or slightly above shoulder height. Lean forward until your feet float. Many people start with a few seconds; build up with sets of 5 to 10 seconds. Target: 3 × 15 seconds with straight arms.
Parallettes help a lot here: they let the wrists stay neutral, and the extra height gives your feet space to lift.
Stage 3: advanced tuck planche
Same position, but the back flattens and the hips move back until they’re level with the shoulders, knees still bent. This lengthens the lever a lot; the jump from tuck to advanced tuck is one of the biggest in the whole progression. Target: 3 × 15 seconds with a flat back.
Stage 4: straddle planche
From the advanced tuck, extend the legs wide apart, hips level with the shoulders. Wider legs bring the center of mass closer to the hands, so the straddle is easier than a full planche. A half-lay (hips extended, knees bent) or a one-leg variation can bridge the gap. Target: 3 × 10–15 seconds.
Stage 5: full planche
Legs together, body straight from shoulders to heels, parallel to the floor. This is a long-term goal for most people, and the gap between straddle and full is large, especially for tall or heavy athletes.
How to check your position
Film yourself from the side. Your hips should be roughly at shoulder height (higher is fine in the tuck), arms vertical or angled back, elbows locked, upper back rounded rather than sagging. If the hips sink below the shoulders, you’re holding a lean, not a planche, so go back a stage.
Find your starting stage
Don’t guess: test yourself fresh, after a wrist warm-up, and start with the first line you can’t pass cleanly.
| Test | If you pass | If you fail |
|---|---|---|
| Planche lean 30 s, shoulders clearly ahead of the hands | Go to the frog stand test | Start at stage 0 |
| Frog stand 30 s, steady | Go to the tuck test | Start at stage 1 |
| Tuck planche 3 × 15 s, arms locked, hips at shoulder height | Go to the advanced tuck test | Start at stage 2 |
| Advanced tuck 3 × 15 s, flat back | Go to the straddle prep drills below | Start at stage 3 |
Most people who meet the prerequisites start at stage 0 or 1. That’s not a step back: the lean is the exercise you’ll keep doing at every stage, because it trains exactly the forward shoulder position the planche needs.
Floor, parallettes or rings?
Where you put your hands changes the planche more than most beginners expect.
| Surface | What it changes | Best for |
|---|---|---|
| Floor, palms flat | Strong wrist extension; feet need space to lift | Leans and frog stands, if your wrists tolerate it |
| Parallettes or push-up handles | Neutral wrists, extra height for the feet, easier to lean | Tuck and advanced tuck; anyone with sensitive wrists |
| Rings | Unstable; you must also stabilise the arms and press the rings into your sides | Advanced trainees; ring planche leans as an extra challenge |
For most people, parallettes are the best tool for learning, and the floor is the place to test that the skill carries over. A low pair is enough; our calisthenics equipment guide covers what to look for. Rings come later: a ring tuck planche is noticeably harder than the same hold on parallettes.
Drills that speed up progress
Static holds teach the position; these drills build the strength behind it.
- Pseudo planche push-ups: push-ups with the hands turned out and placed by the lower ribs, shoulders leaning ahead of the hands. 3 × 6–10. The more you lean, the harder they get.
- Tuck planche negatives: from a frog stand or a pike, lower slowly into a tuck and hold as long as you can. 3–4 × 5–8 seconds.
- Planche lean on parallettes or rings: the rings add instability and make the hold harder.
- Pike push-ups: build the overhead and front-shoulder strength that supports everything above.
- L-sit and compressions: a strong compression makes the tuck easier to hold tight.
Use the slow, strength-focused approach: hard sets with a few seconds left in the tank, not maximal grinding. The ACSM position stand on resistance training supports this kind of progressive overload, increasing difficulty in small steps when the current level becomes manageable.
Band-assisted planche
A resistance band takes part of your weight off the hardest point of the lever, so you can hold a longer position (straddle or full) with good form before you have the strength for it. Loop a band around a low, solid anchor such as the base of a rack or parallettes heavy enough not to move, or over a bar set at about hip height, and place it under your hips (for a tuck) or around your hips and upper thighs (for a straddle or full planche).
- Use it to learn the shape of the next stage, not to replace the hold you’re working on: keep your unassisted holds as the main work.
- Pick a band that still leaves the hold hard after 8 to 10 seconds.
- Make sure the band can’t slip off the anchor. Check it before every set.
Bands are useful but they help most at the bottom of the hold, where the lever is longest. That’s why your unassisted hold time is the number that matters in your log.
Straddle prep: from advanced tuck to straddle
The jump from advanced tuck to straddle is where many people stay stuck for months. These drills bridge the gap:
- One-leg advanced tuck: from the advanced tuck, extend one leg back and slightly out, then switch legs between sets. 4 × 5–8 s per leg.
- Half-lay (or half-straddle): hips extended, knees bent, so the thighs are in line with the trunk. It’s closer to the straddle than the advanced tuck.
- Straddle leans on the floor: legs wide, feet on the floor, lean forward as far as you can with arms locked. The wider the legs, the more the lean resembles the real straddle.
- Straddle compression and pike work: active flexibility in a wide straddle makes it easier to keep the legs high. The L-sit progression builds the same compression.
Planche push-up progression
Planche push-ups are the dynamic version of the hold: you lower your chest toward the floor and press back up while staying in the planche position. They’re very hard, so the pseudo planche push-up is where nearly everyone starts. Each step uses the same rule: the shoulders stay ahead of the hands for the whole rep.
| Step | Exercise | Target before moving on |
|---|---|---|
| 1 | Pseudo planche push-up, small lean | 3 × 10 |
| 2 | Pseudo planche push-up, deep lean (hands at the hips) | 3 × 8 |
| 3 | Tuck planche push-up (on parallettes) | 3 × 5 |
| 4 | Advanced tuck planche push-up | 3 × 5 |
| 5 | Straddle planche push-up | 3 × 3–5 |
| 6 | Full planche push-up | Long-term goal |
A practical rule: you’re usually ready for planche push-ups at a stage once you can hold that stage for about 15 seconds. Below that, partial reps (the top third of the movement) and slow negatives are a good bridge. Keep the volume low, 2 or 3 sets, because bent-arm pushing in this position loads the wrists and the front of the shoulders a lot. For the rest of your chest and triceps work, the calisthenics chest workout has routines by level.
A weekly planche plan
Two or three sessions a week, never on consecutive days. Each session takes about 20 to 30 minutes and fits at the start of a push or full-body workout, when you’re fresh.
| Block | Sets × reps/time | Rest |
|---|---|---|
| Wrist warm-up (circles, rocks on palms and on the backs of the hands) | 3–4 min | – |
| Scapular push-ups | 2 × 10 | 60 s |
| Main hold at your current stage | 4–6 × 5–15 s | 90–120 s |
| Planche lean or pseudo planche push-ups | 3 × 20 s or 3 × 8 | 90 s |
| Tuck negatives (from stage 2) | 3 × 5–8 s | 90 s |
| Hollow body hold | 2–3 × 20–30 s | 60 s |
Write down each hold: stage, seconds per set, and whether the arms stayed straight. In Titan Mode, each session shows your sets, hold times and rest timer, and you log what you actually did, so you move up when your logs say so rather than on a good day’s impression.
Sample 8-week block from planche lean to tuck
| Weeks | Focus |
|---|---|
| 1–2 | Planche lean 3 × 20 s, frog stand 3 × 20 s, pseudo planche push-ups 3 × 6 |
| 3–4 | Lean 3 × 25 s with more angle, frog stand 3 × 30 s, tuck attempts 5 × 3–5 s |
| 5–6 | Tuck planche 5 × 5–8 s, tuck negatives 3 × 5 s, pseudo planche push-ups 3 × 8 |
| 7–8 | Tuck planche 5 × 8–12 s, lean 3 × 30 s; week 8 lighter, then test 3 × 15 s |
Sample 12-week block from tuck to advanced tuck
Once the tuck is solid (3 × 15 s), the next stage takes longer. This block assumes 2 or 3 planche sessions a week; repeat it rather than rushing if you’re not there at week 12.
| Weeks | Main hold | Assistance |
|---|---|---|
| 1–3 | Tuck 5 × 12–15 s, opening the hips a little more each week | Pseudo planche push-ups 3 × 8, lean 3 × 30 s |
| 4–6 | Advanced tuck attempts 5 × 3–5 s, then tuck 2 × 15 s | Tuck planche push-up negatives 3 × 3, band-assisted advanced tuck 3 × 8–10 s |
| 7–9 | Advanced tuck 5 × 5–8 s | Tuck planche push-ups or partials 3 × 3–5, lean on parallettes 3 × 20 s |
| 10–12 | Advanced tuck 5 × 8–12 s; week 12 lighter, then test 3 × 15 s | Hollow body and compression work 2–3 sets |
If your wrists or elbows complain, drop the assistance volume first, not the main hold. Following a block like this over three months is exactly where a log pays off: Titan Mode plans your weekly sessions around your goal and your equipment, and keeps track of each hold you log, so you can compare week 1 with week 12 instead of relying on memory.
Common planche mistakes
- Bent arms. The most common problem. It feels easier but trains a different skill. Lock the elbows even if it means a shorter hold or an easier stage.
- Not leaning enough. Without enough lean, the feet won’t lift, and people compensate by jumping or bending the arms.
- Collapsed shoulders. If your chest sinks between the shoulder blades, push the floor away and round the upper back.
- Hips too low. A sagging tuck becomes a lean with feet in the air. Keep the hips up.
- Training to exhaustion every session. Maximal holds every time slow recovery and add strain to wrists and elbows.
- Skipping the wrist warm-up. Five minutes saves weeks of irritation.
A realistic timeline
Everyone progresses at a different pace. Body weight, limb length and training history change everything. These are broad ranges for someone who trains consistently 2 to 3 times a week and already meets the prerequisites:
| Stage | Typical time from the previous one |
|---|---|
| Planche lean 30 s | 2–6 weeks |
| Tuck planche 15 s | 2–6 months |
| Advanced tuck 15 s | 6–12 months |
| Straddle planche | 1–2 years or more |
| Full planche | Often several years; many never get there |
That’s not discouraging; it’s normal. Every stage on the way is a demanding strength skill in its own right. For a broader view of what to expect from bodyweight training, see how long it takes to see calisthenics results.
Protect your wrists and elbows
Straight-arm skills load tendons more than muscles. Tendons adapt slower: Magnusson and Kjaer’s review describes tendon tissue remodeling over months, which is why sudden jumps in volume are a common cause of pain.
- Warm up your wrists every time, and use parallettes or push-up handles if flat-palm work hurts.
- Increase one thing at a time: hold time, lean angle or stage, never all three at once.
- Watch the inner elbow and the front of the shoulder. A dull ache that lasts into the next day means too much volume. Drop back a stage for a week or two.
- Keep straight-arm volume modest, especially if you also train the front lever or back lever. Two or three skill sessions a week in total is plenty for most people.
- Sharp pain is a stop sign. If pain persists, see a physiotherapist or doctor before continuing.
Fitting the planche into your training
The planche is a skill, not a full program. Keep regular pushing work, such as dips, push-ups and pike push-ups, for muscle and general strength, and balance it with pulling. Research on load and muscle growth by Schoenfeld and colleagues shows that hard sets build muscle across a wide range of loads, so your usual push-up and dip sets still count; the planche holds are added on top, not instead.
A good balance is one pushing skill (planche or handstand) and one pulling skill (front lever) at most. If your handstand isn’t solid yet, our guide on how to do a handstand builds the wrist tolerance and shoulder stability the planche relies on. On the pulling side, weighted pull-ups or the front lever progression keep the shoulders balanced. If you want a side-on skill that uses the same locked-arm pushing, the human flag is often learned in parallel.
Skill work, sequenced for you
The planche rewards patience more than intensity, and the hardest part is knowing when to move up and when to stay put. Titan Mode builds your plan around the skills and strength goal, the sessions you can do each week and the equipment you have, from parallettes to just the floor, and guides each session with sets, hold times and rest. It’s a plan to follow, not a promised date: your logs decide when you move to the next stage.
This article is general information, not medical advice. If you have a medical condition, an injury, pain or are pregnant, talk to a health professional before changing your training or diet.
FAQ
How long does it take to learn the planche?
It depends heavily on body weight, limb length and training history. As a rough guide, a solid tuck planche takes a few months once you have the prerequisites, the advanced tuck often another 6 to 12 months, and a full planche usually several years. Many dedicated people stop at the straddle, and that's still an impressive skill.
Is the planche harder than the front lever?
For most people, yes. Both are straight-arm holds with the body horizontal, but the planche puts your weight on your hands and wrists with the shoulders leaning far ahead of them, and pushing muscles are usually weaker in that position. Most athletes reach each front lever stage before the matching planche stage.
What are the prerequisites for the planche?
A reasonable starting point is 20 clean push-ups, 10 strict dips, a 30-second planche lean with straight arms and pain-free wrists in extension. A 30-second hollow body hold and a wall handstand help too. You can play with leans before that, but the tuck planche is easier to learn with this base.
Should I bend my arms in the planche?
No. The planche is a straight-arm skill: elbows locked, biceps facing forward or slightly out. Bent-arm versions feel easier but train a different skill and won't carry over. If you can't keep the arms straight, go back one stage.
Do planche push-ups build muscle?
Pseudo planche push-ups and planche leans train the front shoulders, chest and triceps hard and are good muscle builders for the upper body. Static holds alone are a limited muscle builder, so keep regular push-ups or dips in your program.
Can women learn the planche?
Yes. The planche is a ratio of strength to body weight and leverage, not a matter of gender. Lighter athletes with shorter legs often progress faster through the tuck stages. The same progression and exit criteria apply.
Do I need parallettes to learn the planche?
No, but they help. Parallettes keep the wrists neutral and give your feet room to lift, which makes the tuck and advanced tuck easier to learn and kinder on the wrists. You can learn on the floor if your wrists tolerate strong extension; just test your holds on both surfaces from time to time.
Should I train the planche every day?
For most people, no. The planche loads the wrists, elbows and front shoulders with straight arms, and tendons adapt slowly. Two or three sessions a week with a rest day in between usually progress faster than daily practice, because you can hold quality positions in each session.
Is the planche harder for tall people?
Usually, yes. A longer body is a longer lever, so a tall or heavy athlete needs more strength for the same stage. The progression is the same; expect each stage to take longer and use the straddle and band-assisted holds as intermediate goals.
How do I start planche push-ups?
Start with pseudo planche push-ups: hands turned out by your lower ribs, shoulders leaning ahead of the hands for the whole rep. When you can do 3 × 8 with a deep lean and hold a tuck planche for about 15 seconds, try tuck planche push-ups on parallettes, using negatives or partial reps at first.
Sources
- Magnusson SP, Kjaer M. The impact of loading, unloading, ageing and injury on the human tendon. J Physiol, 2019
- American College of Sports Medicine. Progression models in resistance training for healthy adults. Med Sci Sports Exerc, 2009
- Schoenfeld BJ, Grgic J, Ogborn D, Krieger JW. Strength and hypertrophy adaptations between low- vs. high-load resistance training: a systematic review and meta-analysis. J Strength Cond Res, 2017