Inverted Row (Australian Pull-Up): Muscles, Form, Plan
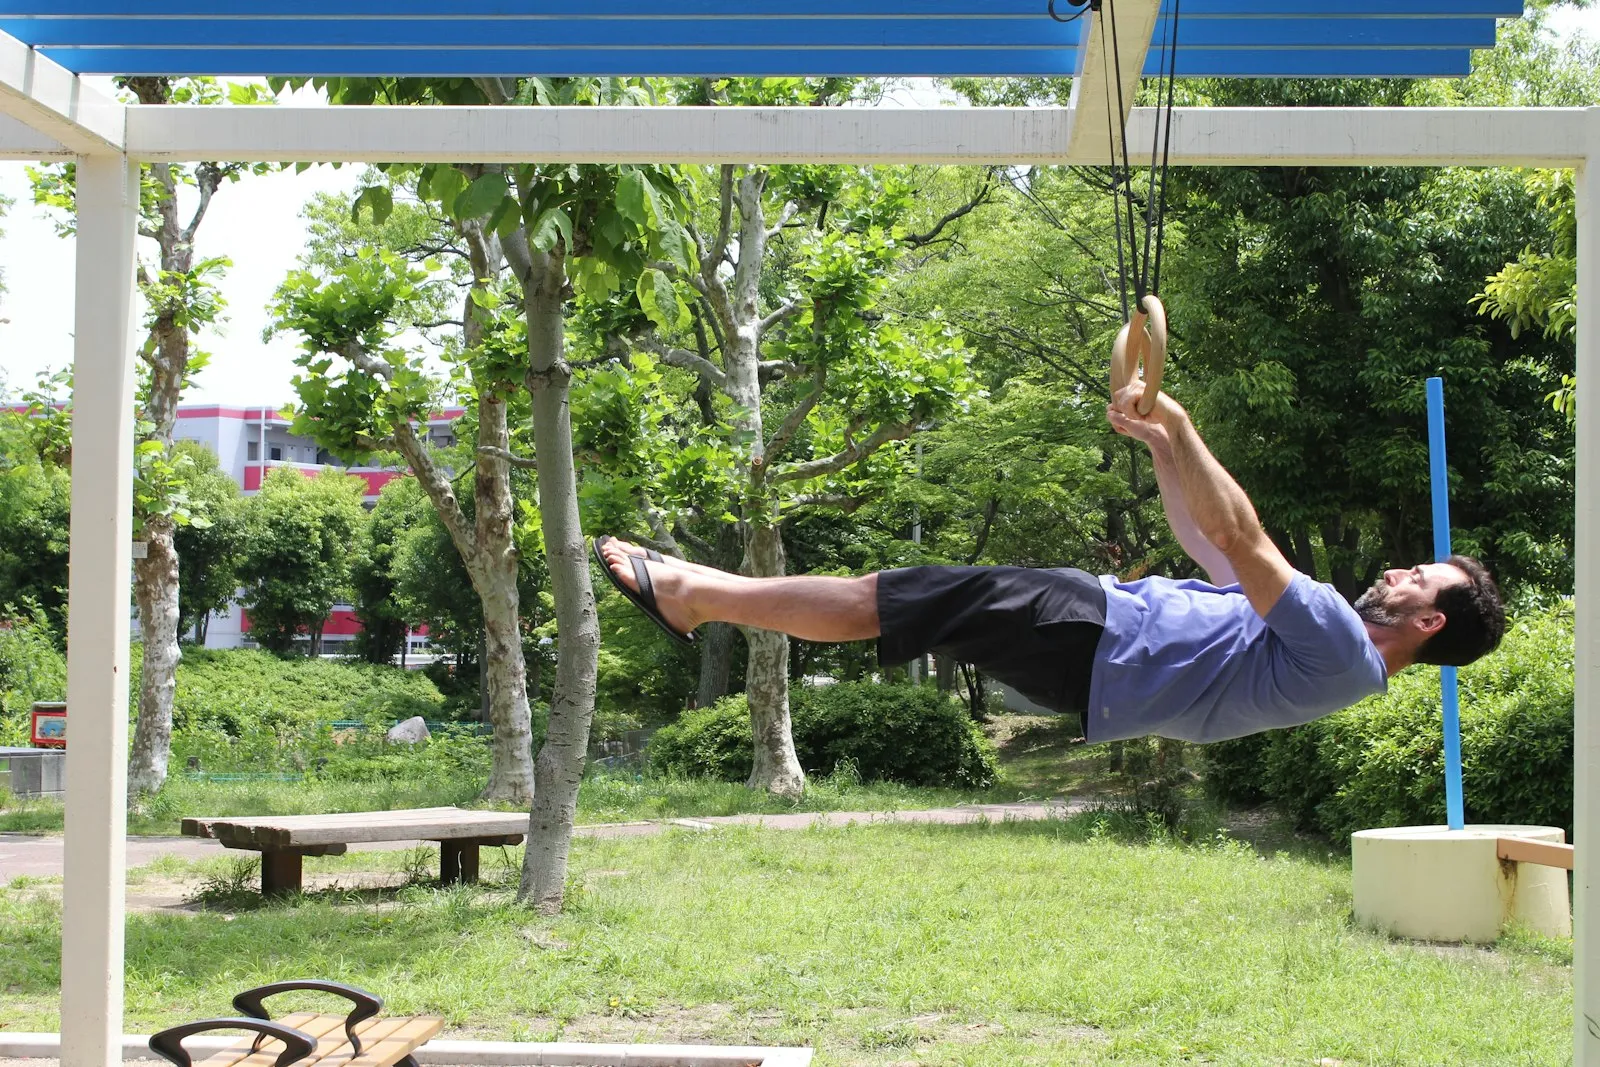
How to do inverted rows (Australian pull-ups): form, muscles worked, which bar to use, easy to advanced variations, workouts and the link to your first pull-up.
If pull-ups are the exercise everyone wants, the inverted row is the one that gets them there. It trains the same back and arm muscles, lets you choose exactly how much of your body weight you lift, and works with a low bar, rings, a table or a door. It’s also one of the best exercises for posture-minded back work, whatever your level.
The short answer: to do an inverted row, lie under a bar set at about waist height, grab it with straight arms a little wider than your shoulders, and raise your hips so your body forms a straight line from heels to head. Pull your chest to the bar by squeezing your shoulder blades together, pause, then lower under control. The more upright your body, the easier it is; the closer to horizontal, the harder. Aim for 3 sets of 8 to 12 clean reps, two or three times a week, and lower the bar as you get stronger.
Below: step-by-step form, the muscles worked, the easiest and hardest versions, which bar to use, how to do rows at home, three ready-made workouts and a plan that links them to your first pull-up. If you want rows, hangs and push-ups organised into a full week, Titan Mode builds your plan around your level and the equipment you have, from a low bar to just a table.
What is an inverted row?
The inverted row is a horizontal pulling exercise done with your body weight. You hang underneath a bar, face up, and pull your chest towards it. It goes by many names: bodyweight row, body row, supine row, and Australian pull-up, because you’re “down under” the bar.
It’s the mirror image of the push-up. A push-up presses your body away from the floor; the inverted row pulls your body towards the bar. Together, they make the simplest balanced upper-body routine there is, which is why both sit at the heart of our 12-week beginner calisthenics program.
Muscles worked
- Lats (latissimus dorsi): they pull your upper arm back and down towards your body.
- Rhomboids and middle/lower trapezius: they squeeze your shoulder blades together at the top. This is where the inverted row shines compared with the pull-up.
- Rear deltoids: the back of the shoulders, often undertrained in people who mostly push.
- Biceps and forearms: they bend the elbows and hold the bar.
- Glutes, hamstrings and core: they keep your body rigid like a reverse plank.
A biomechanics study compared three rows (the inverted row, the standing bent-over row and a one-arm cable row). The inverted row produced the highest activation of the lats, the upper back and the hip extensors, and the lowest load on the lower spine of the three (Fenwick et al., 2009). In plain terms: a lot of back work, with little stress on your lower back.
How to do an inverted row, step by step
- Set the bar. Start with a bar around waist to hip height. A Smith machine, a low bar in a street workout park, a sturdy table edge or rings all work.
- Grip. Overhand, hands slightly wider than shoulder-width, thumbs wrapped around the bar.
- Get under it. Slide under the bar with straight arms so the bar is above your lower chest. Heels on the floor, legs straight (or knees bent for an easier version).
- Make a plank. Squeeze your glutes and brace your abs so your body forms one straight line from heels to head. If your hips keep sagging, the hollow body hold trains exactly this whole-body tension. Neck neutral: look at the ceiling, not at your toes.
- Pull. Lead with your shoulder blades: pull them together and down, then bend your elbows and bring your lower chest to the bar. Keep your elbows at roughly 45 degrees from your body, not flared straight out.
- Pause at the top for one second, chest touching or nearly touching the bar.
- Lower slowly over two to three seconds to straight arms. Let your shoulder blades spread at the bottom, then start the next rep.
Breathe out as you pull, in as you lower. Every rep should look the same: if your hips sag or your chin pokes forward to reach the bar, the set is over.
Easier and harder versions
The main lever is your body angle. The more horizontal your body, the more of your weight you lift. Moving your feet forward or lowering the bar makes the row harder; walking your feet back or raising the bar makes it easier. Change one thing at a time so you can compare sessions.
| Level | Variation | Move on when |
|---|---|---|
| 1 | Standing row: bar or rings at chest height, body at about 45° | 3 × 15 clean reps |
| 2 | Bent-knee row: bar at waist height, knees bent, feet flat | 3 × 12 |
| 3 | Straight-leg row: body close to horizontal, heels on the floor | 3 × 12 |
| 4 | Feet-elevated row: heels on a box or bench, body horizontal | 3 × 10 |
| 5 | Slow or paused rows: 3-second lowering, 2-second hold at the top | 3 × 8 |
| 6 | Weighted rows (vest or backpack), archer rows or one-arm assisted rows | — |
Bent-knee rows aren’t “cheating”: they let your legs take part of the load, exactly like an incline push-up. Our push-up progression follows the same logic, and the two progressions pair well in the same session.
Grip options
- Overhand, slightly wide: more upper back and rear shoulders.
- Underhand, shoulder-width: the biceps help more, often a little easier, just like chin-ups compared with pull-ups.
- Neutral or rings: rings let your wrists rotate during the rep and are often the kindest option for elbows and shoulders.
Advanced variations
Once feet-elevated rows feel easy for 10 or more reps, these versions keep the exercise challenging without a weight vest:
- Archer row: pull towards one hand while the other arm stays almost straight along the bar. It shifts most of the load onto one side and is the bridge to one-arm work.
- One-arm assisted row: one hand on the bar or ring, the other lightly holding a towel or strap for help. Reduce the help over the weeks.
- High row (to the neck): elbows wider, bar finishing near the collarbones. It shifts work towards the rear deltoids and upper trapezius; use a lighter angle, because it’s harder than it looks.
- Tuck front lever row: hold a tuck front lever and row from it. Only once you own the static hold, as covered in our front lever progression.
- False-grip rows on rings: the wrist sits over the ring, as in the muscle-up transition. A good specific drill if a ring or bar muscle-up is your goal.
Which bar to use for inverted rows
You don’t need a dedicated “inverted row bar”, but the bar you choose changes how easy it is to progress.
- Height: you want a bar you can set or find at several heights. Around hip height is the usual start; around knee height (or feet elevated) for strong rows. A bar that is too high only allows the easiest, almost standing version.
- Smith machine or squat rack: the most common gym option. In a rack, put a barbell on the safety pins or J-hooks, check it can’t roll off, and adjust height one hole at a time to track progress precisely.
- Street workout park: most parks have a low bar or parallel bars at hip height. Parallel bars let you row with a neutral grip between them.
- Rings or a suspension trainer: the most adjustable option. You change the angle by walking your feet, and the handles turn with your wrists. They also travel, which makes them a good investment if you train at home; our calisthenics equipment guide compares the options.
- Doorway pull-up bars: most are designed to hang high in the frame, not to sit at hip height, so they rarely work for rows. Don’t wedge one low in a doorframe unless the manufacturer explicitly allows it.
Whatever you use, the bar must hold your full weight with room to spare and must not slide or roll during the rep.
Inverted rows at home: no bar needed
- Table row: lie under a sturdy table, grip the edge, keep your body straight and pull your chest to the table. Test the table with your full weight first and never use one that tips, wobbles or has a glass top.
- Door towel row: loop a towel around both handles of a solid closed door, hold the ends, lean back and pull. Make sure the door opens away from you and the handles are firmly fixed.
- Rings or a suspension trainer: anchored over a solid door or a beam, they give you the full range and an adjustable angle.
- Broomstick between two chairs: only with a thick, strong pole and heavy chairs that can’t slide. If in doubt, skip it.
You’ll find complete routines built around these options in our calisthenics workout at home without equipment.
Inverted rows and your first pull-up
The row and the pull-up train overlapping muscles, but they’re not the same movement. The pull-up is a vertical pull that loads the lats and biceps heavily (Youdas et al., 2010); the row is horizontal and loads more of the mid-back. You’ll usually get to your first pull-up faster with both than with either one alone.
A practical sequence:
- Build to 3 × 10 straight-leg rows with your body close to horizontal.
- Add dead hangs and scapular pulls: our dead hang guide shows how long to hang and how to progress.
- Add negatives (lowering from the top of a pull-up in 3 to 5 seconds) while keeping rows in every pull session.
- Keep rows after you get your first pull-up: they balance your back and keep building strength for more reps.
The full step-by-step path, with tests and a weekly schedule, is in our guide to doing your first pull-up.
Inverted row vs pull-up vs bent-over row
People searching for “inverted row vs pull-up” usually want to know which one to do. The honest answer is: they do different jobs, and most programs use at least two of them.
| Inverted row | Pull-up | Bent-over row (barbell or dumbbell) | |
|---|---|---|---|
| Direction of pull | Horizontal | Vertical | Horizontal |
| Main emphasis | Mid-back, rear shoulders, lats | Lats, biceps | Mid-back, lats, lower back holding the hinge |
| How you adjust the load | Body angle, feet height | Bands, negatives, added weight | Plates or dumbbells |
| Lower-back load | Low (Fenwick et al., 2009) | Low | Higher: the spine is held bent forward under load |
| Equipment | Low bar, rings, table | Bar you can hang from | Barbell or dumbbells |
| Best for | Beginners, posture, balancing push-ups, high reps | Building a strong vertical pull and calisthenics skills | Lifters who want to load heavy and track kilograms |
For a calisthenics program, the simplest rule is one vertical pull and one horizontal pull in each pulling session: pull-ups (or their progressions) plus inverted rows. If you train at the gym too, the row and the bent-over row can swap with each other from one block to the next; our comparison of calisthenics and gym training shows how to combine both styles in one week.
Sets, reps and weekly plan
Bodyweight exercises build strength and muscle when you take sets close to failure: a study matching muscle activity found push-ups and the bench press gave similar strength gains (Calatayud et al., 2015), and a meta-analysis found that lighter loads for more reps build similar muscle to heavier loads when sets are hard enough (Schoenfeld et al., 2017). The same principle applies to rows.
- Frequency: two or three sessions a week, never two hard pulling days in a row, in line with standard guidance for novices (ACSM, 2009).
- Volume: 3 to 4 sets of 6 to 15 reps, stopping one to three reps before your form breaks.
- Rest: 90 seconds to 2 minutes between sets.
- Progression: when you hit the top of the rep range on every set, make the row harder by one step (lower bar, feet forward, feet elevated).
Example 6-week plan
| Weeks | Session A | Session B |
|---|---|---|
| 1–2 | Rows at your level 3 × 8–12 + dead hang 3 × max | Rows 3 × 8–12 + push-ups 3 × 8–12 |
| 3–4 | Rows 4 × 8–12 (one step harder if possible) + scapular pulls 3 × 8 | Rows 3 × 10 with a 3-second lowering + push-ups |
| 5–6 | Rows 4 × 10–12 + hang 2 × max | Feet-elevated or paused rows 3 × 6–8 + retest your max at your usual angle |
Write down the variation and the bar height, not just the reps: “8 reps” means nothing without the angle. That’s exactly where a training log earns its keep. With Titan Mode, each guided session shows your sets, reps and rest times, and you can swap a variation when you need an easier or harder one.
Inverted row workouts
Three ready-to-use sessions. Warm up for five minutes first (arm circles, band pull-aparts or a few easy rows), and pick the variation where the last two reps of each set are hard but clean.
1. Beginner upper-body pairing (any bar, 25 minutes)
- A1. Inverted rows: 3 × 8–12
- A2. Push-ups at your level: 3 × 8–12
- Rest 60 to 90 seconds after each pair.
- B. Dead hang: 2 × as long as you can hold with good shoulders.
2. At-home back session (table, towel or rings, 20 minutes)
- Table or ring rows: 4 × 8–12, 3-second lowering
- Towel door rows with a 2-second squeeze: 3 × 10–15
- Reverse snow angels lying face down: 2 × 12
- Plank: 2 × 30–45 s
3. Pull-up preparation (bar, 30 minutes)
- Scapular pulls: 3 × 8
- Pull-up negatives: 3 × 3–5, 3 to 5 seconds down
- Feet-elevated rows: 3 × 6–10
- Chin-up hold at the top: 2 × max
If you can do 15 or more rows at your hardest angle, use the row as a finisher instead: one set to two reps short of failure at the end of any pull session.
Common mistakes
- Sagging hips. Your body should stay straight. If your hips drop, raise the bar or bend your knees.
- Pulling with the neck. Reaching for the bar with your chin shortens the rep and strains the neck. The chest touches the bar, not the chin.
- Half reps. Go to straight arms at the bottom and chest to the bar at the top.
- Elbows flared at 90 degrees. Keep them at about 45 degrees for comfortable shoulders.
- Shrugging. Keep your shoulders away from your ears; think “shoulder blades into your back pockets”.
- Feeling it only in your arms. Start each rep by pulling the shoulder blades back, think of driving the elbows towards your hips, and try a slightly wider overhand grip.
- Dropping fast. The lowering phase builds strength too. Take two to three seconds.
- Comparing reps at different angles. Use the same bar height and foot position to track progress.
Safety and limits
- Check your setup: bars rated for your weight, a table that doesn’t tip, a door that opens away from you, rings anchored to something solid.
- Shoulders and elbows: start with an easier angle and add load gradually. A neutral grip or rings are usually best if your elbows are sensitive.
- Stop with sharp pain in a joint, or numbness and tingling in the hands. Muscle burn is normal; joint pain is not.
- Injury or medical condition: if you’re recovering from a shoulder, elbow or back injury, ask a physiotherapist which angle and range suit you.
Make the row your most reliable exercise
The inverted row is the rare exercise that suits almost everyone: a complete beginner can do it standing nearly upright, an advanced athlete can do it with feet elevated and a weight vest. Keep it in your program, track the angle along with the reps, and it will quietly build the back that every pulling skill, from the pull-up to the front lever, depends on. To build it into a full session, our calisthenics back workout pairs rows with pull-ups and lower-back work for every level.
This article is general information, not medical advice. If you have a medical condition, an injury, pain or are pregnant, talk to a health professional before changing your training or diet.
FAQ
What muscles do inverted rows work?
The lats, the rhomboids and the middle and lower trapezius do most of the work, with the rear deltoids, the biceps and the forearms helping. The glutes, hamstrings and core work too, because they keep your body straight like a plank throughout the movement.
Are inverted rows as good as pull-ups?
They're a different movement, not a weaker one. The pull-up is a vertical pull that loads the lats heavily; the inverted row is a horizontal pull that hits the mid-back and rear shoulders harder. Most calisthenics programs use both. For beginners, the row is usually the better place to start because you can adjust the load with your body angle.
Do inverted rows help you do a pull-up?
Yes. They build the back, arm and grip strength the pull-up needs, with a load you can control. They don't replace practising the vertical pull itself, so pair them with hangs, scapular pulls and negatives once you can do around 10 good rows with your body close to horizontal.
How many inverted rows should I be able to do?
With your body roughly horizontal and heels on the floor, 10 clean reps is a solid beginner target, 15 to 20 is a good intermediate level, and 10 or more with your feet elevated is strong. Compare reps at the same body angle, otherwise the numbers mean nothing.
Can I do inverted rows at home without a bar?
Yes: under a sturdy table, with a towel looped around the handles of a solid closed door, or on rings or a suspension trainer anchored above a door. Always test the setup with your full weight first and avoid tables that tip or have a glass top.
Overhand or underhand grip for inverted rows?
Both work. An overhand grip with your hands a little wider than your shoulders puts more emphasis on the upper back and rear shoulders; an underhand grip lets the biceps help more and is often a bit easier. Rings let you switch between the two during the rep.
What height should the bar be for inverted rows?
Start with the bar around hip height and your heels on the floor. Lower it a notch, or put your feet on a box, when you can do 3 sets of 12 clean reps. Write the height down so you compare sessions at the same angle.
Are inverted rows good for building muscle?
Yes, if the sets are hard enough. Research on bodyweight and light-load training shows that sets taken close to failure build muscle much like heavier loads, so pick an angle where 6 to 15 reps are challenging and make it harder as you progress.
Inverted row or bent-over row: which is better?
Both are horizontal pulls. The inverted row puts less load on the lower back and needs only a bar or rings; the bent-over row lets you add weight in small steps. In a calisthenics program, the inverted row is the default choice.
Sources
- Fenwick C.M., Brown S.H., McGill S.M. (2009). Comparison of different rowing exercises: trunk muscle activation and lumbar spine motion, load, and stiffness. J Strength Cond Res.
- Youdas J.W. et al. (2010). Surface electromyographic activation patterns and elbow joint motion during a pull-up, chin-up, or Perfect-Pullup rotational exercise. J Strength Cond Res.
- Calatayud J. et al. (2015). Bench press and push-up at comparable levels of muscle activity results in similar strength gains. J Strength Cond Res.
- Schoenfeld B.J. et al. (2017). Strength and hypertrophy adaptations between low- vs. high-load resistance training: a systematic review and meta-analysis. J Strength Cond Res.
- American College of Sports Medicine (2009). Progression models in resistance training for healthy adults. Med Sci Sports Exerc.